Kitchen renovation
How We Turned the Worst Kitchen on the Street into the Heart of Our Home
Introduction
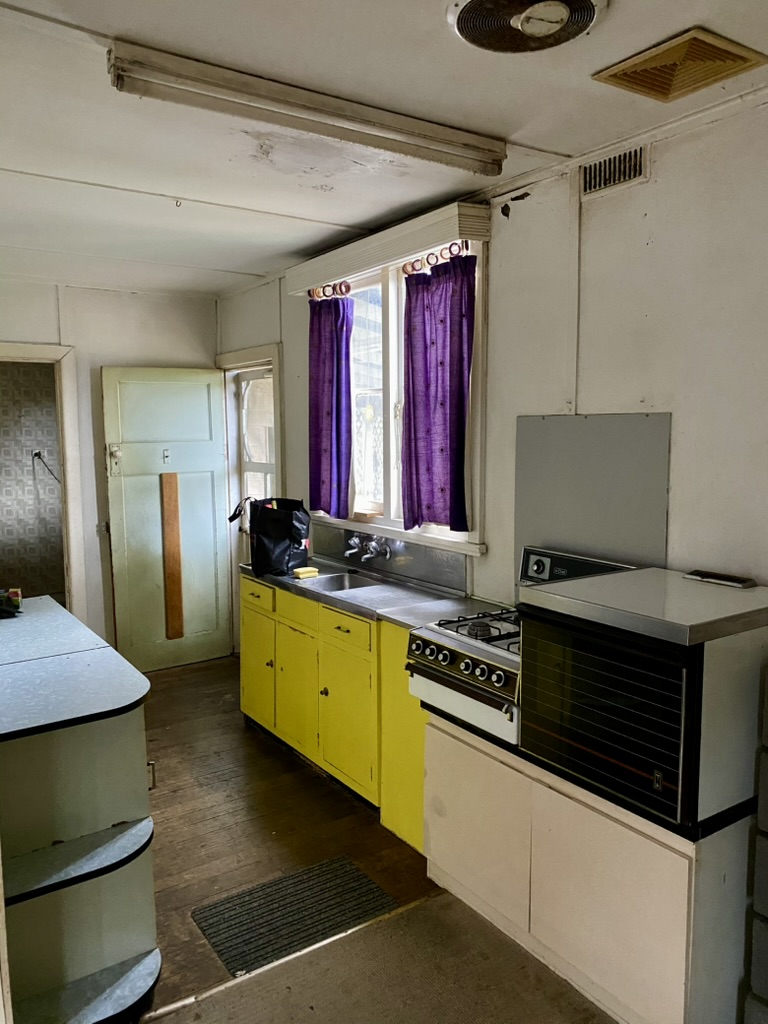
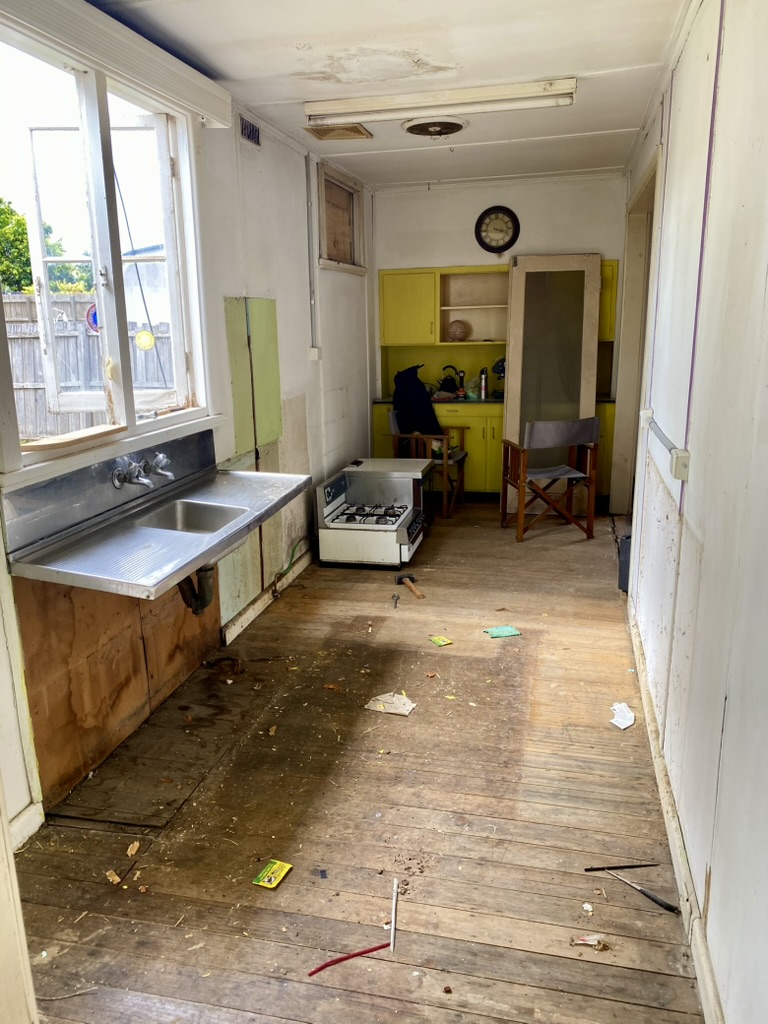
When we bought our 100 year old home, the kitchen was one of the first rooms we knew had to change. It was old, tired and barely functional. The appliances were reaching the end of their life, there was very little usable bench space, and the layout simply did not work for a young family.
The renovation was never about creating a luxury kitchen. It was about designing a space that was practical, welcoming and affordable, using clever ideas, second hand finds and plenty of DIY.
The Biggest Problem Was Not the Kitchen
The biggest issue was not the dated cupboards or worn finishes. It was the layout.
The only access to the backyard was through the kitchen. The back door opened onto a falling down verandah and was also the path to the outdoor toilet, which was the only toilet in the house when we first bought it.
The kitchen became a thoroughfare. If someone was cooking, everyone else had to squeeze past to get outside. It was cramped, frustrating and impossible for more than one person to use comfortably.
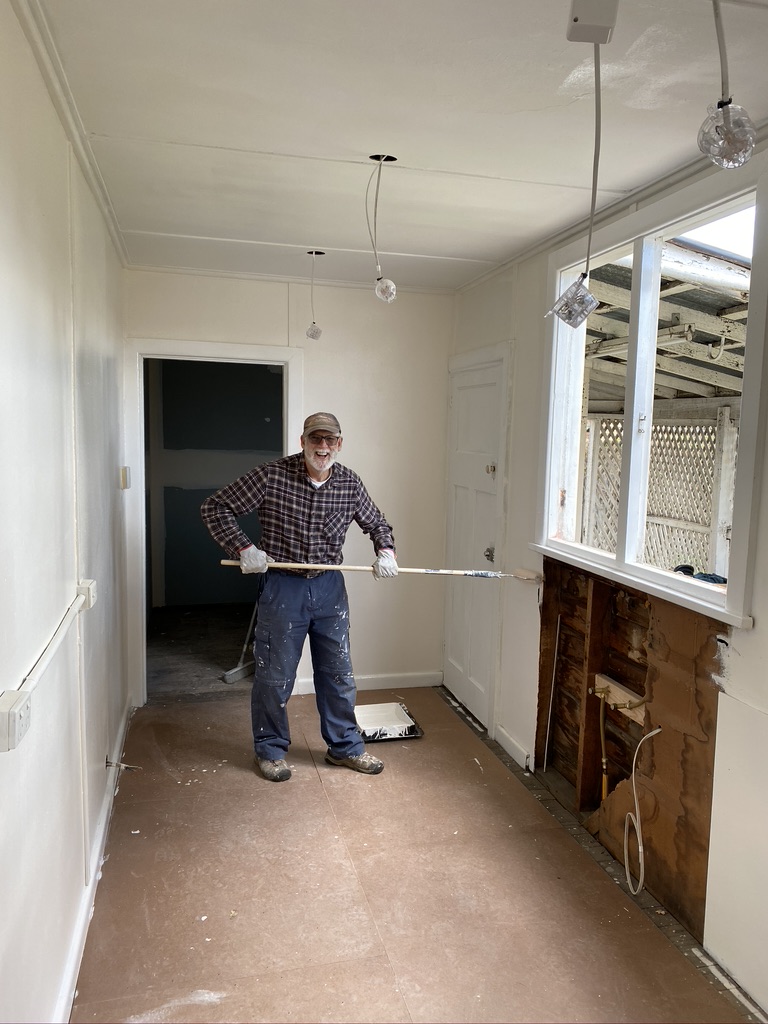
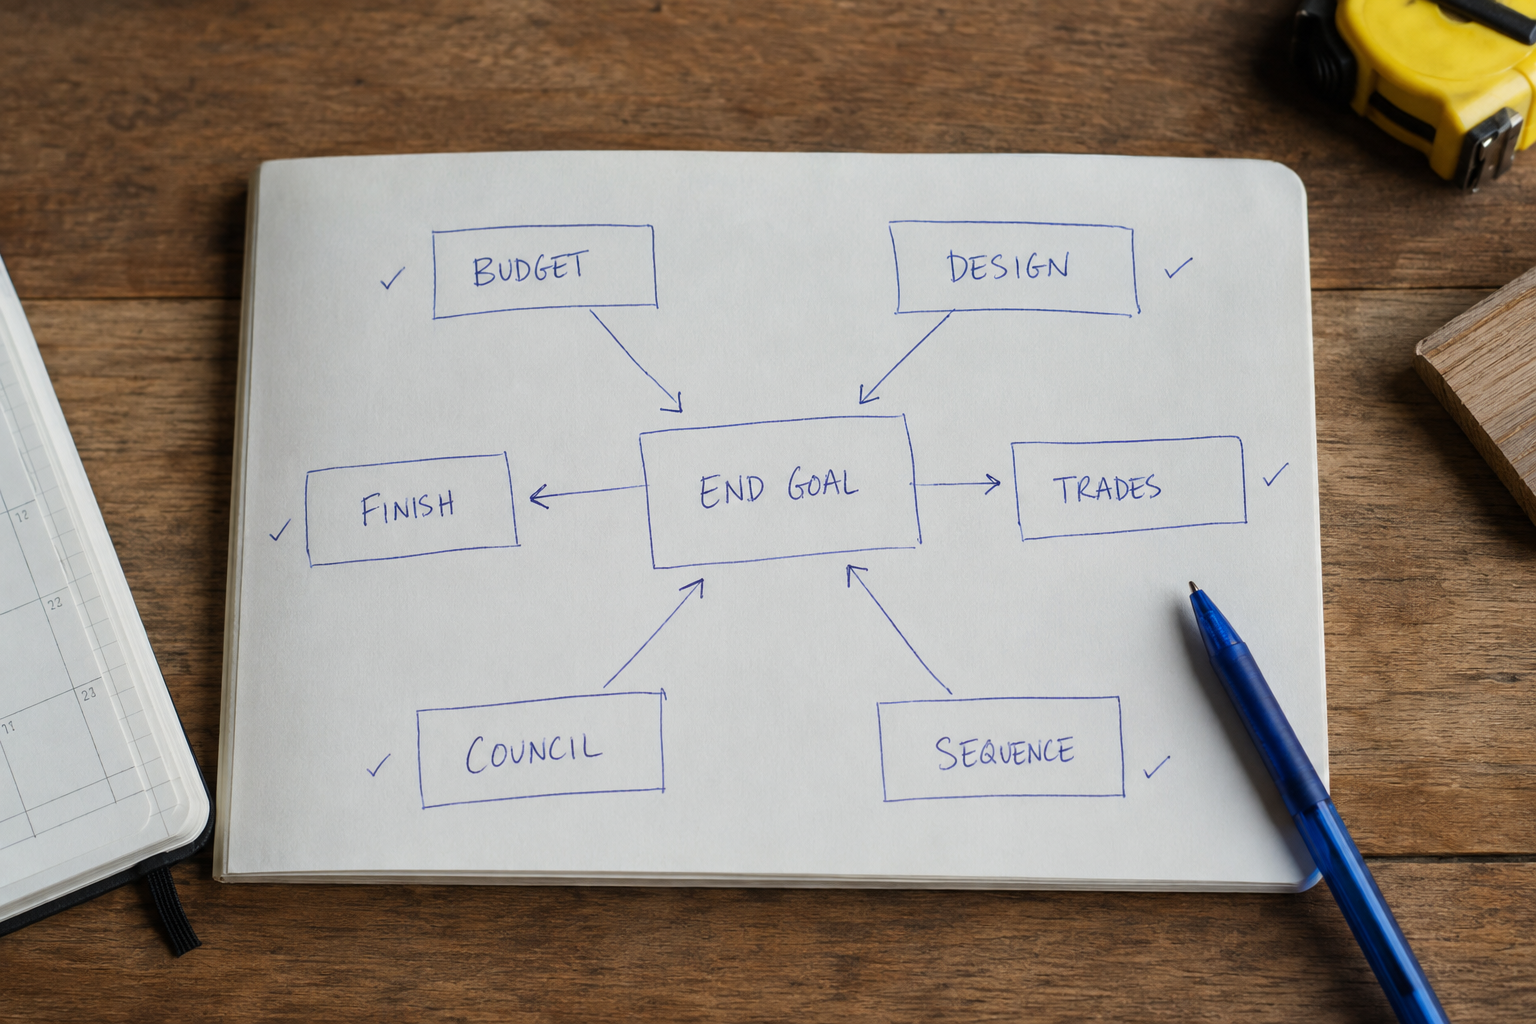
Moving the second hand door to create a walkthrough changed the kitchen layout and made it important to record our measurements and decisions before reorganising the space. The Home Renovation Project Planner is designed to help keep the details together.
One Simple Change Made All the Difference
I realised there was a much better solution.
One wall had a high window that had been boarded up, and it seemed like the perfect place for a new back door.
Moving the doorway created a much more natural path from the lounge room to the backyard. It also freed up an entire corner of the kitchen that had previously needed to remain clear.
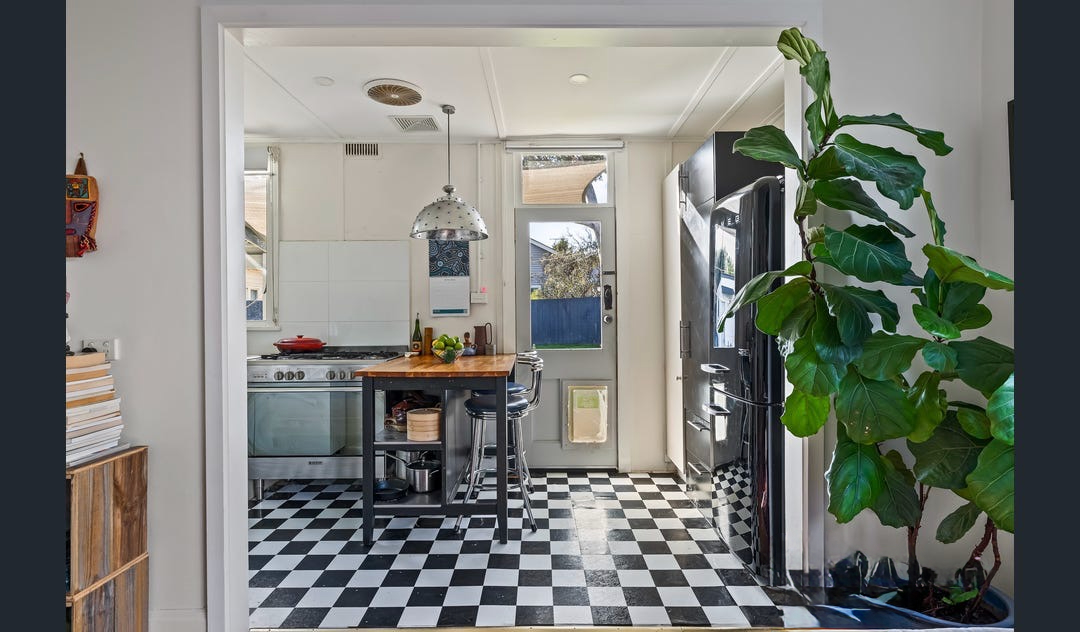
Because we already knew that one day we would renovate the rear of the house, we kept the original door in place, sealed around it to keep out the weather, and built a corner bench and cupboards across it. It was an inexpensive solution that gave us valuable extra storage and much more bench space.
Sometimes one layout decision can completely change how a room works.
Finding the Perfect Door
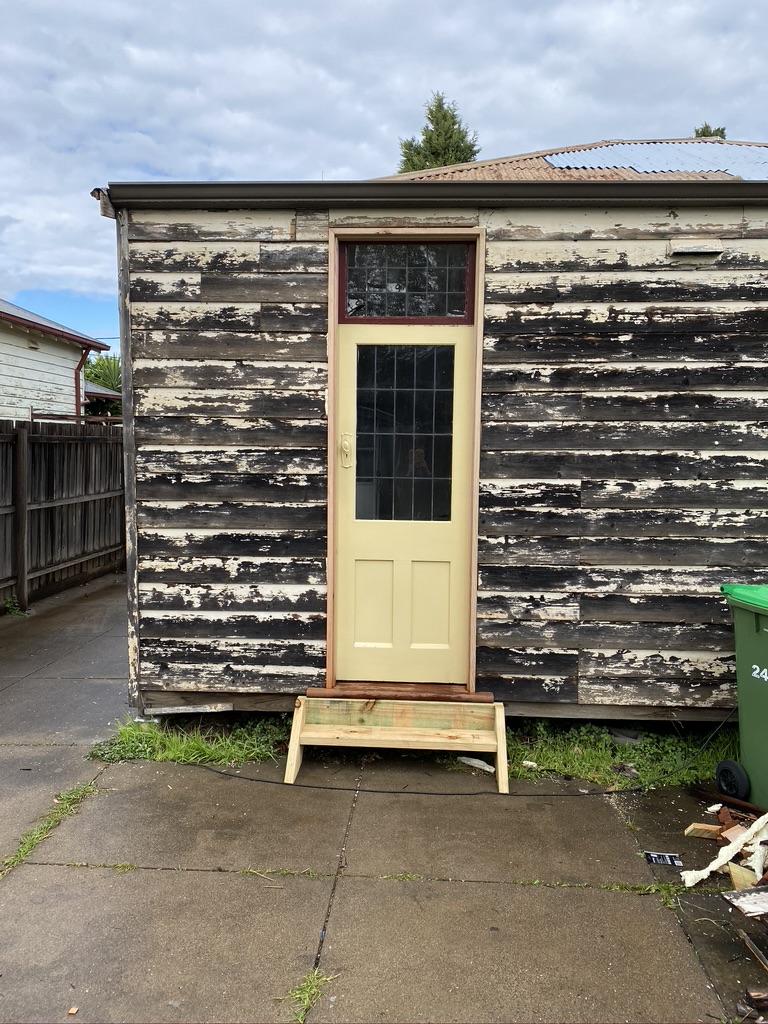
Rather than buying a brand new back door, I found an original timber door at a Melbourne architectural salvage yard.
It had been removed from another 100 year old home, so it felt like it belonged in ours.
It was also far more affordable than buying new, and the large glass panels allowed plenty of natural light into the kitchen.
Dad helped me prepare and paint the door before our builder installed it. It is still one of my favourite features of the renovation because it gives the kitchen so much character while honouring the home's history.
Dad and I also painted the whole inside of the kitchen. One useful tip I learnt was to choose Dulux Natural White rather than Vivid White. Natural White covered more easily, so we needed fewer coats.
Building a Kitchen on a Budget
One of the best decisions we made was shopping second hand.
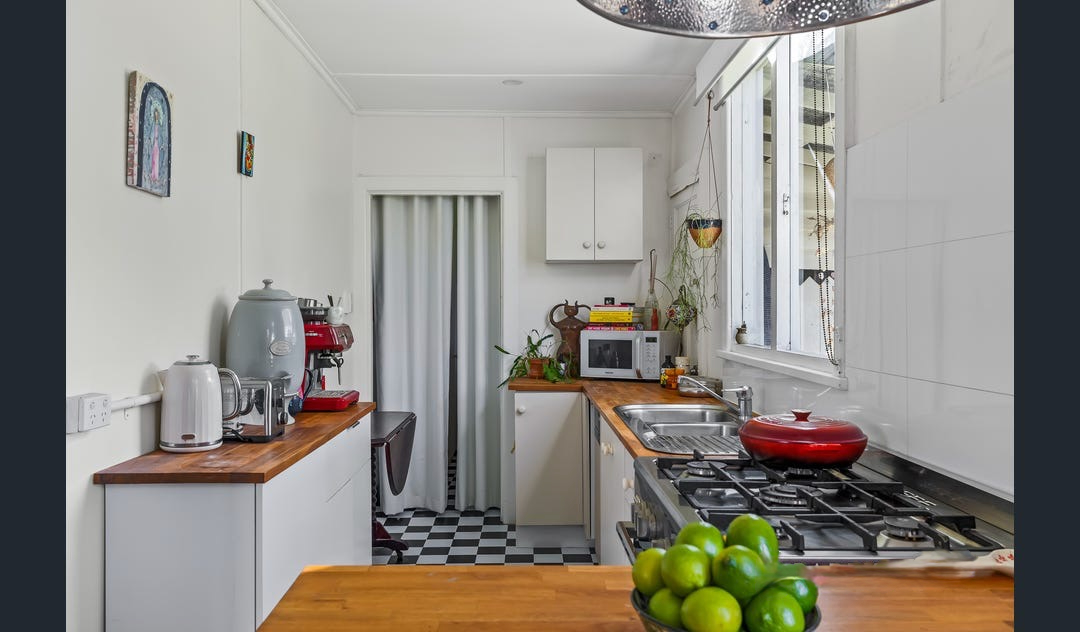
Instead of buying an entirely new kitchen, I found half a kitchen on Facebook Marketplace. Rather than using it exactly as it had been installed, I selected the cabinets that suited our space and designed a layout that worked for our kitchen.
Because the room is long and narrow, storage had to work without making the space feel even tighter. The only cabinet I bought new was a long, shallow cabinet, which I mounted on the wall away from the window. It gave us useful extra storage while keeping the brighter side of the room open.
The savings did not stop there.
Our 900 mm oven came from the same architectural salvage yard as the back door, while the dishwasher was another Marketplace find. We finished everything with timber benchtops, creating a kitchen that looked custom without the custom price tag.
I also bought a few more of the same white tiles and asked the tiler to complete the splashbacks behind the stovetop and sink at the same time. It was a simple way to finish both working areas neatly without creating another job later.
One lesson I learnt is to always check Facebook Marketplace before buying a kitchen. People renovating often sell perfectly good cabinet carcasses and appliances for a fraction of their original cost. With a little patience and creativity, you can build a beautiful kitchen without spending a fortune.
A Floor I Had Always Wanted
I have always loved classic checkerboard floors, and I knew this renovation was probably my only chance to include one.
Rather than choosing expensive floor tiles, Dad and I laid self adhesive vinyl tiles directly over the existing floorboards. They were affordable, surprisingly easy to install and completely changed the feel of the room.
Years later, they are still one of my favourite design features in the house, and I would choose the same pattern again without hesitation.
The Heart of Our Home
The biggest transformation was not the cupboards or the finishes. It was the way we lived in the space.
Before the renovation, the kitchen was not somewhere anyone wanted to spend time. There was no dishwasher, no proper oven or cooktop, and cooking was difficult. It simply was not designed for family life.
Afterwards, everything changed.
The new layout meant more than one person could comfortably be in the kitchen at once. Cooking became something we could do together instead of getting in each other's way.
Adding a breakfast bar and stools created somewhere for family and friends to sit while meals were being prepared. It became a place for conversations, homework, cups of tea and everyday moments, not just cooking.
Looking back, that is what made this renovation worthwhile. We did not build an expensive kitchen. We created a room that finally became the heart of our home.
More from Great Ocean Road Living